How to install and run Stable Diffusion on Apple Silicon M1/M2 Macs
166,208 views
Updated October 6, 2023By AndrewCategorized as Tutorial Tagged Beginner
133 Comments

Stable Diffusion is a text-to-image AI that can be run on personal computers like Mac M1 or M2. In this article, you will find a step-by-step guide for installing and running Stable Diffusion on Mac.
Here are the install options I will go through in this article.
- Draw Things – Easiest to install with a good set of features.
- Diffusers – Easiest to install but with not many features.
- DiffusionBee – Easy to install but with a smaller set of functions.
- AUTOMATIC1111 – Best features but a bit harder to install.
Alternatively, run Stable Diffusion on Google Colab using AUTOMATIC1111 Stable Diffusion WebUI. Check the Quick Start Guide for details.
Read this install guide if you want to install Stable Diffusion on a Windows PC.
VISIT OUR SPONSOR
Use Stable Diffusion XL online, right now, from any smartphone or PC.
Contents [hide]
- Hardware requirements
- Draw Things App
- Diffusers App
- DiffusionBee
- AUTOMATIC1111
- Web options to run AUTOMATIC1111
- Pros and Cons of AUTOMATIC1111
- Frequently Asked Questions
-
- Does AUTOMATIC1111 on Mac support SDXL?
- I got the error “urllib.error.URLError: <urlopen error [SSL: CERTIFICATE_VERIFY_FAILED] certificate verify failed: unable to get local issuer certificate (_ssl.c:997)>” when generating images
- I got “RuntimeError: Cannot add middleware after an application has started”
- I got RuntimeError: “LayerNormKernelImpl” not implemented for ‘Half’
- When running v2-1_768-ema-pruned.ckpt model, the I got the error: “modules.devices.NansException: A tensor with all NaNs was produced in Unet. This could be either because there’s not enough precision to represent the picture, or because your video card does not support half type. Try setting the “Upcast cross attention layer to float32″ option in Settings > Stable Diffusion or using the –no-half commandline argument to fix this. Use –disable-nan-check commandline argument to disable this check.”
-
- Next Steps
VISIT OUR SPONSOR
Want a hassle-free A1111 experience?
Kickstart this workflow in minutes on a fully managed A1111 at Think Diffusion. 20% extra credits.
Hardware requirements
You will need a Mac with Apple Silicon (M1 or M2) for reasonable speed.
Recommended CPUs are: M1, M1 pro, M1 max, M2, M2 pro and M2 max. In addition to the efficient cores, the performance cores are important for Stable Diffusion’s performance.
The computer’s form factor doesn’t really matter. It can be a Macbook Air, Macbook Pro, Mac Mini, iMac, Mac Studio, or Mac Pro.
Ideally, your machine will have 16 GB of memory or more.
Stable Diffusion, like many AI models, runs slower on Mac. A similarly priced Windows PC with a dedicated GPU will deliver an image faster.
Become a Plus member to unlock member-only workflows.
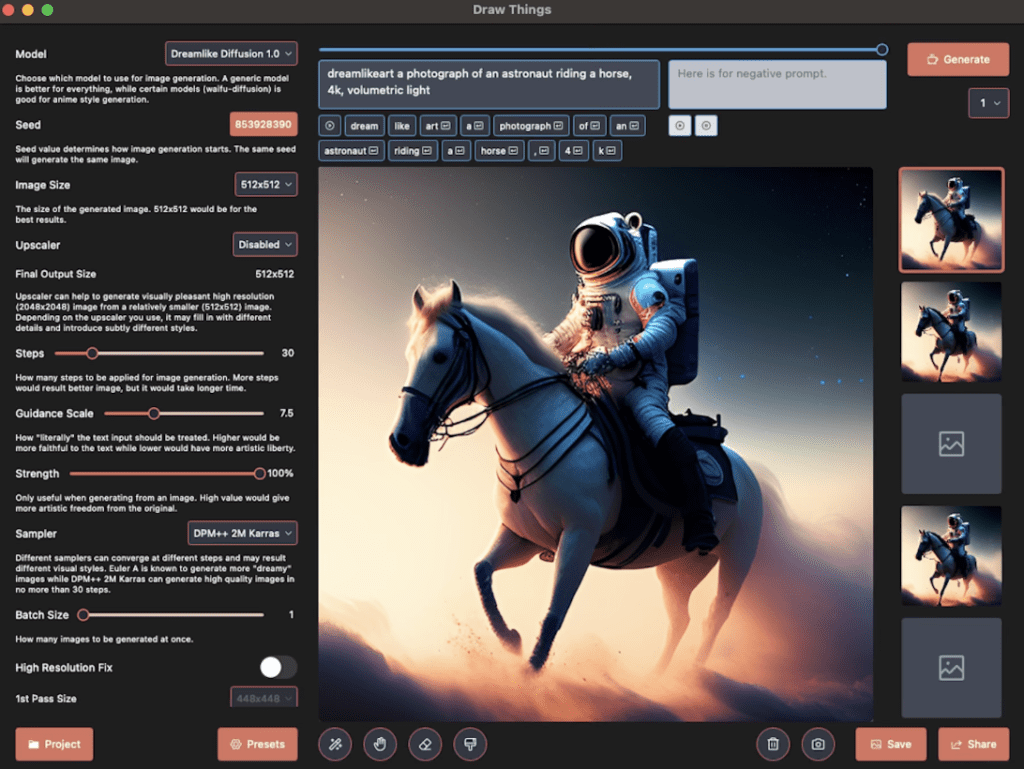
Draw Things App
Install Instructions
Draw Things
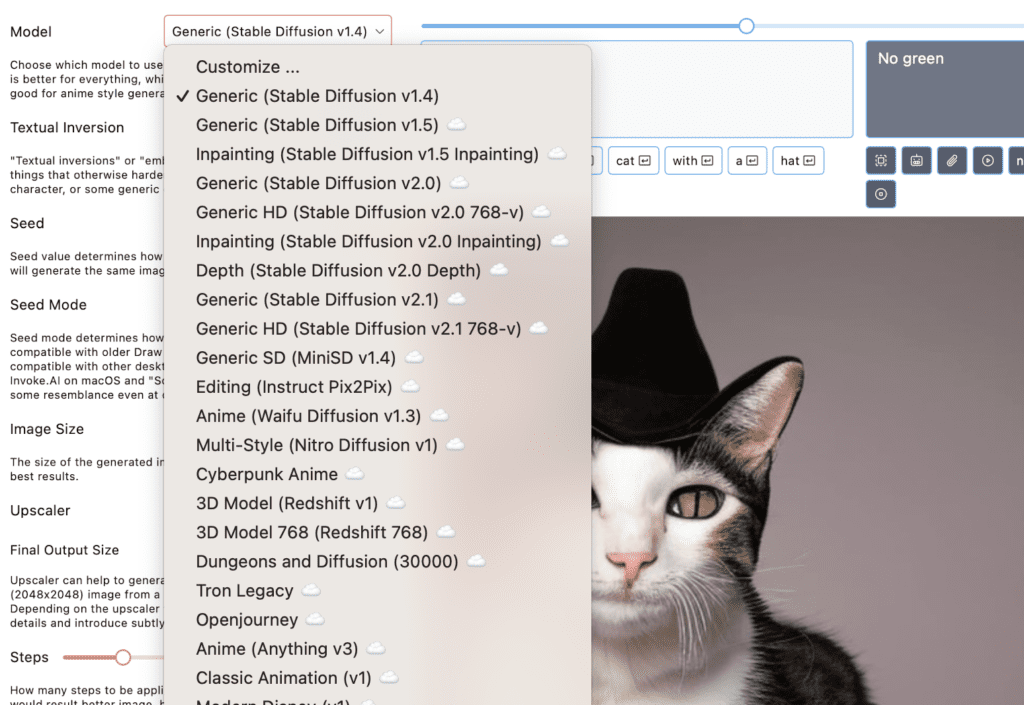
Draw Things is an Apple App that can be installed on iPhones, iPad, and Macs. Installing it is no different from installing any other App.
It supports a pretty extensive list of models out of the box and a reasonable set of customizations you can make. It also supports inpainting.
Pros and Cons of Draw Things App
Pros
- Easy to install
- A good set of features
Cons
- Features are not as extensive as AUTOMATIC1111
Diffusers App
Install Instructions

Diffusers is a Mac app made by Hugging Face, the place where many Stable Diffusion models are hosted. You can install the app using the link below.
Customizations and available models are pretty limited.
Pros and Cons of Diffusers App
Pros:
- Easy to install.
Cons:
- Very limited models and features.
DiffusionBee
In this section, you will learn how to install and run DiffusionBee on Mac step-by-step.
Install DiffusionBee on Mac
DiffusionBee is one of the easiest ways to run Stable Diffusion on Mac. Its installation process is no different from any other app.
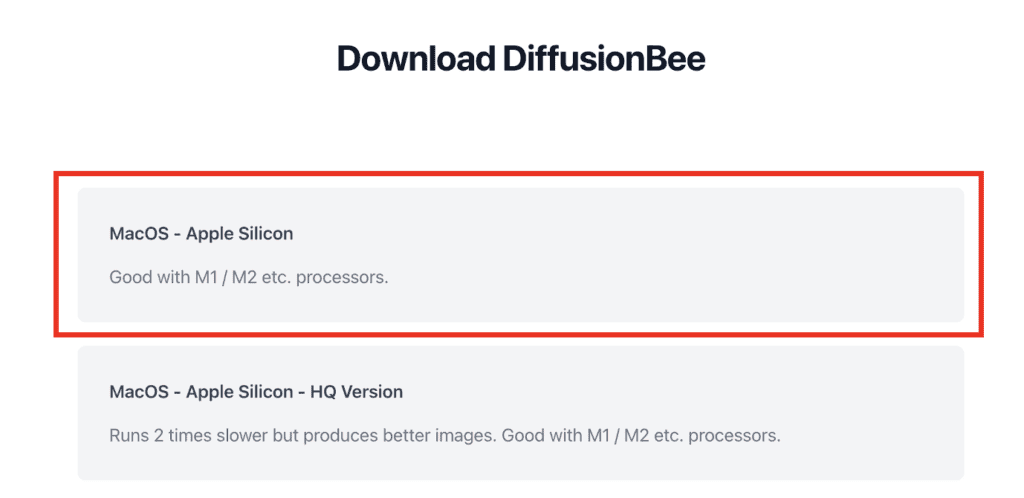
Step 1: Go to DiffusionBee’s download page and download the installer for MacOS – Apple Silicon. A dmg file should be downloaded.
Step 2: Double-click to run the downloaded dmg file in Finder. The following windows will show up.
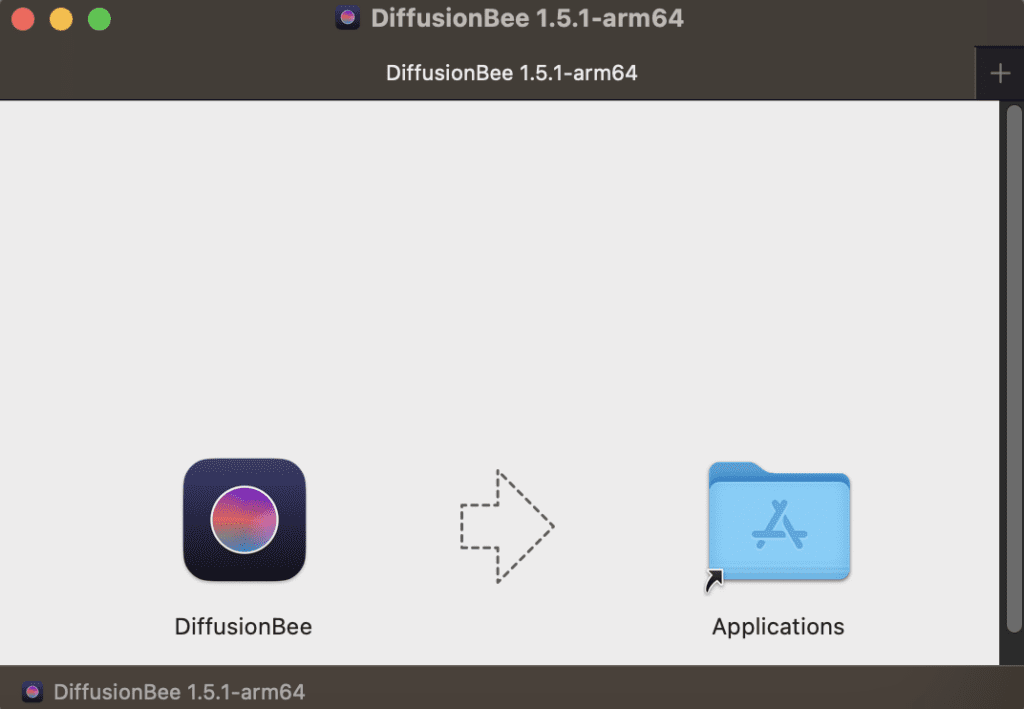
Step 3: Drag the DiffusionBee icon on the left to the Applications folder on the right. Installation is now complete!
Run DiffusionBee on Mac
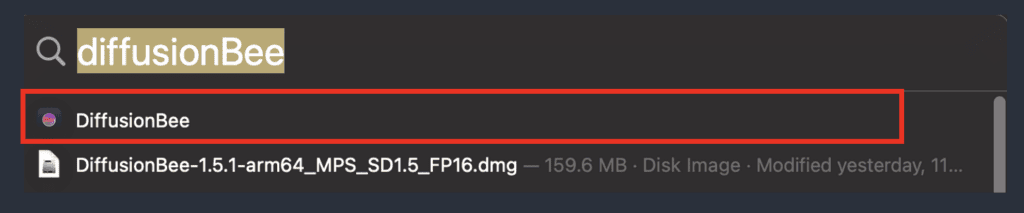
You can use the spotlight search bar to start StableBee. Press command + spacebar to bring up spotlight search. Type “DiffusionBee” and press return to start DiffusionBee.
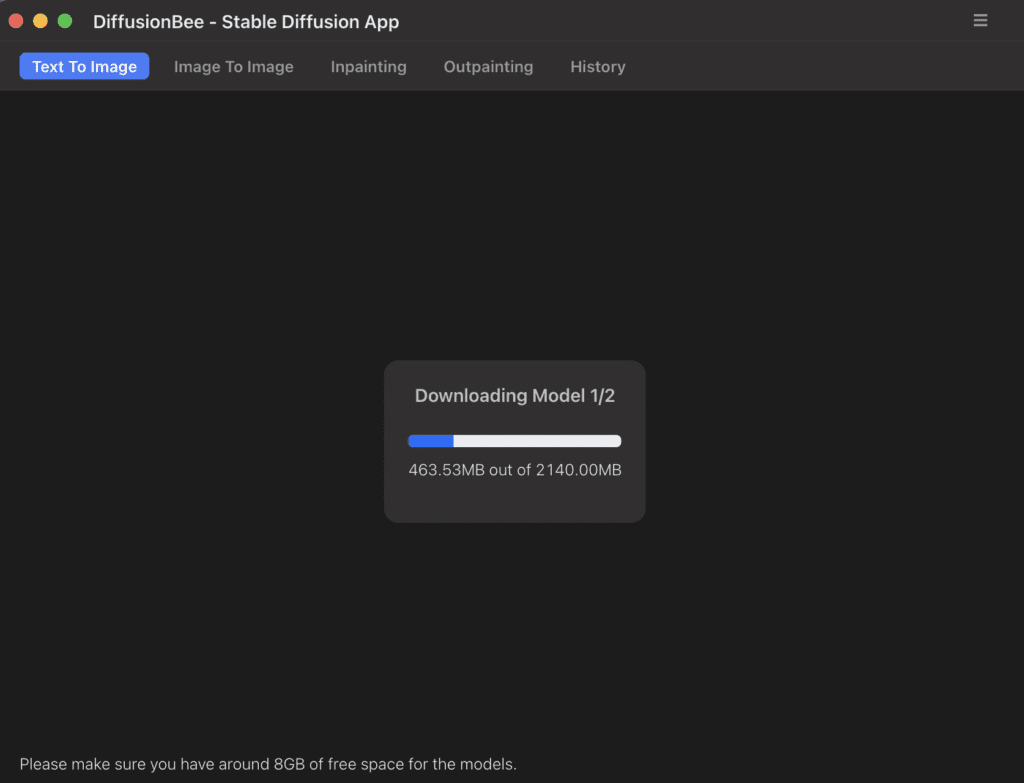
It will download some models when it starts for the very first time.
After it is done, you can start using Stable Diffusion! Let’s try putting the prompt “a cat” in the prompt box and hit Generate.

Works pretty well! You can click the option button to customize your images such as image size and CFG scale.
Go to the Next Step section to see what to do next.
Pros and Cons of DiffusionBee
Pros
- Installation is relatively easy
Cons
- Features are a bit lacking.
AUTOMATIC1111
This section shows you how to install and run AUTOMATIC1111 on Mac step-by-step.
DiffusionBee is easy to install but the functionality is pretty limited. If you are (or aspired to be) an advanced user, you will want to use an advanced GUI like AUTOMATIC1111. You will need this GUI if you want to follow my tutorials.
Install AUTOMATIC1111 on Mac
Step 1: Install Homebrew, a package manager for Mac, if you haven’t already. Open the Terminal app, type the following command, and press return.
/bin/bash -c "$(curl -fsSL https://raw.githubusercontent.com/Homebrew/install/HEAD/install.sh)"Step 2: Install a few required packages. Open a new terminal and run the following command
brew install cmake protobuf rust python@3.10 git wgetStep 3: Clone the AUTOMATIC1111 repository by running the following command in the terminal
git clone https://github.com/AUTOMATIC1111/stable-diffusion-webuiA new folder stable-diffusion-webui should be created under your home directory.
Step 4: You will need a model to run Stable Diffusion. Use the following link to download the v1.5 model.
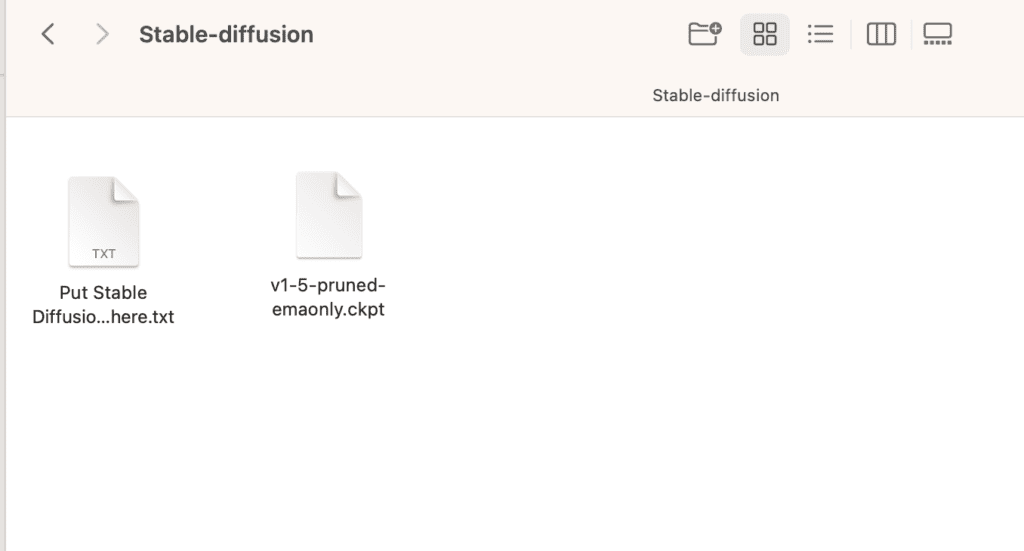
Put the file in the folder stable-diffusion-webui/models/Stable-diffusion. You can get there in the Finder app. In the top menu, click Go and then Home. Double Click to go to the folder stable-diffusion-webui, and then models, and then Stable-diffusion.
When you are done with this step, the Stable-diffusion folder should have two files like below.
Run AUTOMATIC1111 on Mac
Follow the steps in this section to start AUTOMATIC1111 GUI for Stable Diffusion.
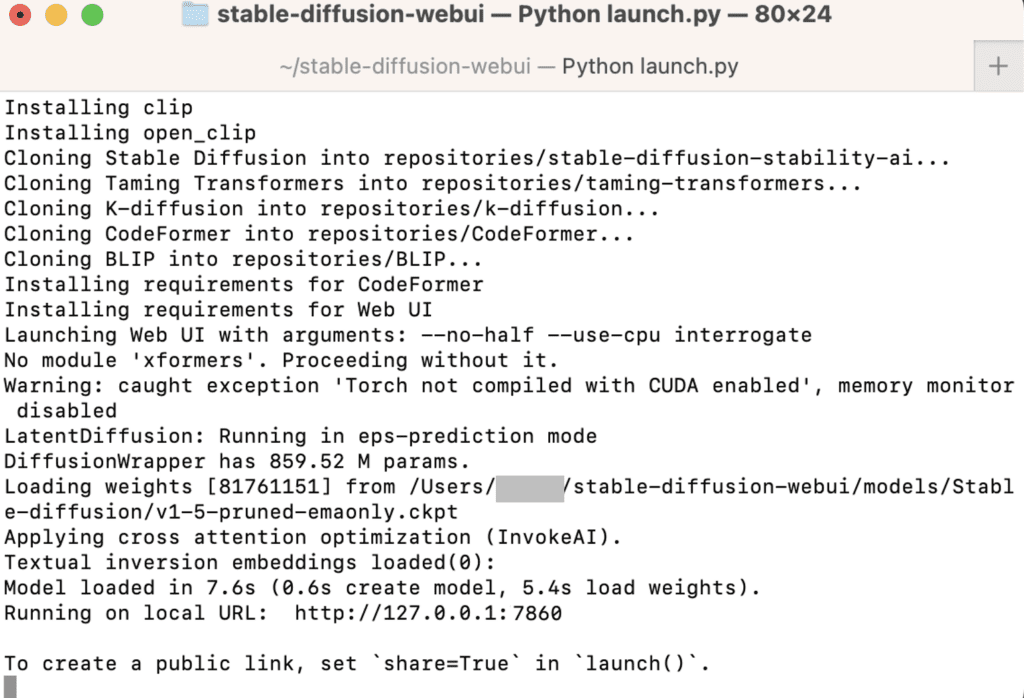
In the terminal, run the following command.
cd ~/stable-diffusion-webui;./webui.sh --no-halfIt will take a while to run it for the first time.
Open a web browser and click the following URL to start Stable Diffusion.
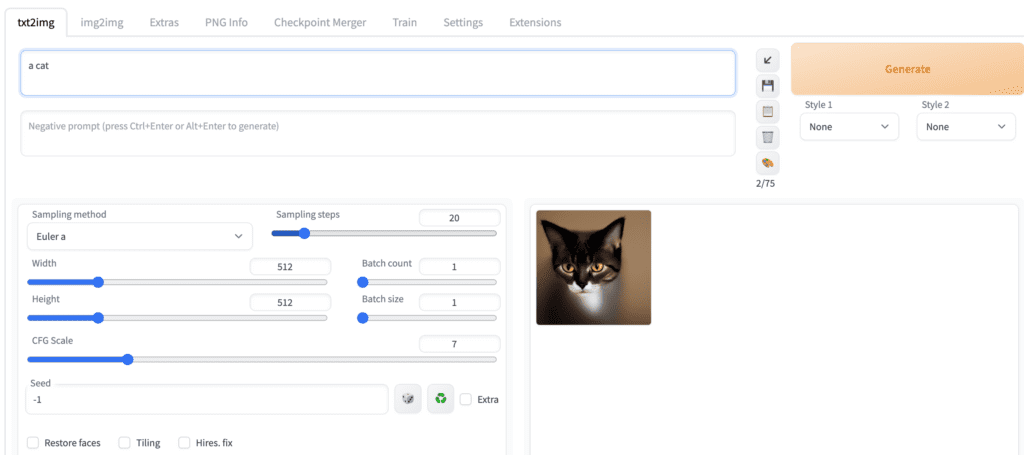
http://127.0.0.1:7860/You should see the AUTOMATIC1111 GUI. Put in a prompt “a cat” and press Generate to test using the GUI.
Close the terminal when you are done. Follow the steps in this section the next time when you want to run Stable Diffusion.
Updating AUTOMATIC1111 Web-UI
Your AUTOMATIC1111 won’t be automatically updated. You will miss new features if you don’t upgrade it periodically. However, there’s always a risk of breaking things every time you update.
To update AUTOMATIC1111, first open the Terminal App.
Go into the AUTOMATIC1111 Web-UI’s folder.
cd ~/stable-diffusion-webuiLastly, update the software by pulling the latest codes.
git pullRun AUTOMATIC1111 to see if it’s working properly. If you experience issues, delete the venv folder inside the stable-diffusion-webui folder and restart again.
Web options to run AUTOMATIC1111
Consider the following options for running Stable Diffusion without installing it locally.
(I earn a small commission if you subscribe.)
Think Diffusion

Think Diffusion lets you use AUTOMATIC1111 online without having a GPU or setting up. The service is provided remotely. Follow the link to get an extra 20% credit.
Pros and Cons of AUTOMATIC1111
Pros
- Best features among all apps
Cons
- Difficult to install if you are not tech-savvy.
Frequently Asked Questions
Does AUTOMATIC1111 on Mac support SDXL?
Yes! You will need to update your AUTOMATIC1111 if you have not done it recently. Just do a git pull. See the SDXL tutorial for downloading the model.
I got the error “urllib.error.URLError: <urlopen error [SSL: CERTIFICATE_VERIFY_FAILED] certificate verify failed: unable to get local issuer certificate (_ssl.c:997)>” when generating images
Press Command+Space to bring up Spotlight search.
Search for
Install Certificates.command
Open and run it. If will tell you which Python version you ran. Make sure you have run Python 3.10.
I got “RuntimeError: Cannot add middleware after an application has started”
If you get the following error:
File “/Users/XXXXX/stable-diffusion-webui/venv/lib/python3.10/site-packages/starlette/applications.py”, line 139, in add_middleware
raise RuntimeError(“Cannot add middleware after an application has started”)
RuntimeError: Cannot add middleware after an application has started
This is caused by an outdated fastapi package. Run the following command in the webui folder.
./venv/bin/python -m pip install --upgrade fastapi==0.90.1I got RuntimeError: “LayerNormKernelImpl” not implemented for ‘Half’
Start the webUI with the following command.
./webui.sh --precision full --no-halfWhen running v2-1_768-ema-pruned.ckpt model, the I got the error: “modules.devices.NansException: A tensor with all NaNs was produced in Unet. This could be either because there’s not enough precision to represent the picture, or because your video card does not support half type. Try setting the “Upcast cross attention layer to float32″ option in Settings > Stable Diffusion or using the –no-half commandline argument to fix this. Use –disable-nan-check commandline argument to disable this check.”
Start webUI with the following command to remove this error.
./webui.sh --no-halfHowever, as of July 2023, the v2.1 768 model does not produce sensible images.
Next Steps
Now you can run Stable Diffusion; below are some suggestions on what to learn next.
- Check out how to build good prompts.
- Check out this article to learn what the parameters in GUI mean.
- Download some new models and have fun!
Becoming a member is the best way to support this site.