How to Use a Steam Deck With a PC
The two ways you can use a Steam Deck with a PC are to transfer files between them or to use the Steam Deck to stream Steam games installed on the PC. Streaming games is a trivial process that just requires both devices to be connected to the same network. Transferring files, however, is more complicated.
The Steam Deck is a mobile device, but you can’t just connect it to a PC via USB like you would with a phone or a tablet. Steam Decks run on Linux, so that would be the same as trying to connect a Linux computer to a Windows computer or even two Windows computers together with a USB cable, which just doesn’t work.
These are the best options for transferring files between a Steam Deck and a PC:
- File transfer app: Warpinator is a file transfer app that’s available on the Steam Deck and also Windows. If you install it on both your Steam Deck and PC, you can transfer files over your home network.
- Portable media: Your steam deck can read USB sticks and micro SD cards, but only if they are formatted correctly.
- Network drive: If you have a network attached storage (NAS) device, you can access it from both your Steam Deck and PC and transfer files that way.
How to Connect Steam Deck to PC With Warpinator
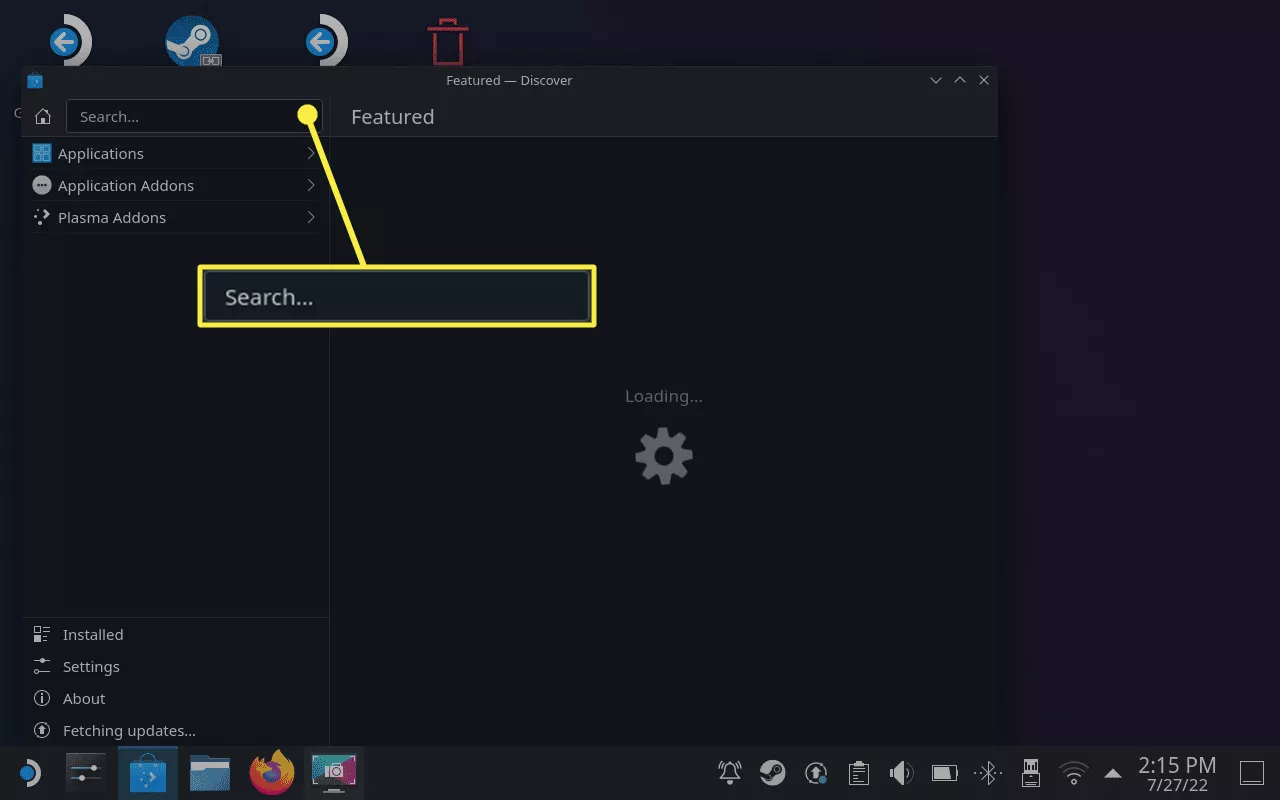
Warpinator is an app available on your Steam Deck through the preinstalled Discover software center. If you install Warpinator on your Steam Deck and Winpinator on your PC, you can send files between the two. The Steam Deck and PC need to be connected to the same network, and transfer speeds are limited by the speed of your local Wi-Fi.
Here’s how to connect Steam Deck to PC with Warpinator:
-
Hold down the power button on your Steam Deck and select Switch to Desktop.

-
Tap Search and type Warpinator.

-
Switch to your PC and open a web browser, then navigate to the Winpinator download site, click Download, and install the app.
If your web browser prompts for confirmation before downloading, allow it. Windows may also require confirmation during installation.
-
Click Send files or Send a folder, and select the file or folder you want to move to your Steam Deck.
-
When you see Awaiting approval from Steam Deck User, switch to your Steam Deck.
-
Tap your PC username in Warpinator.
Warpinator will display your Windows user name and PC name on this screen.
-
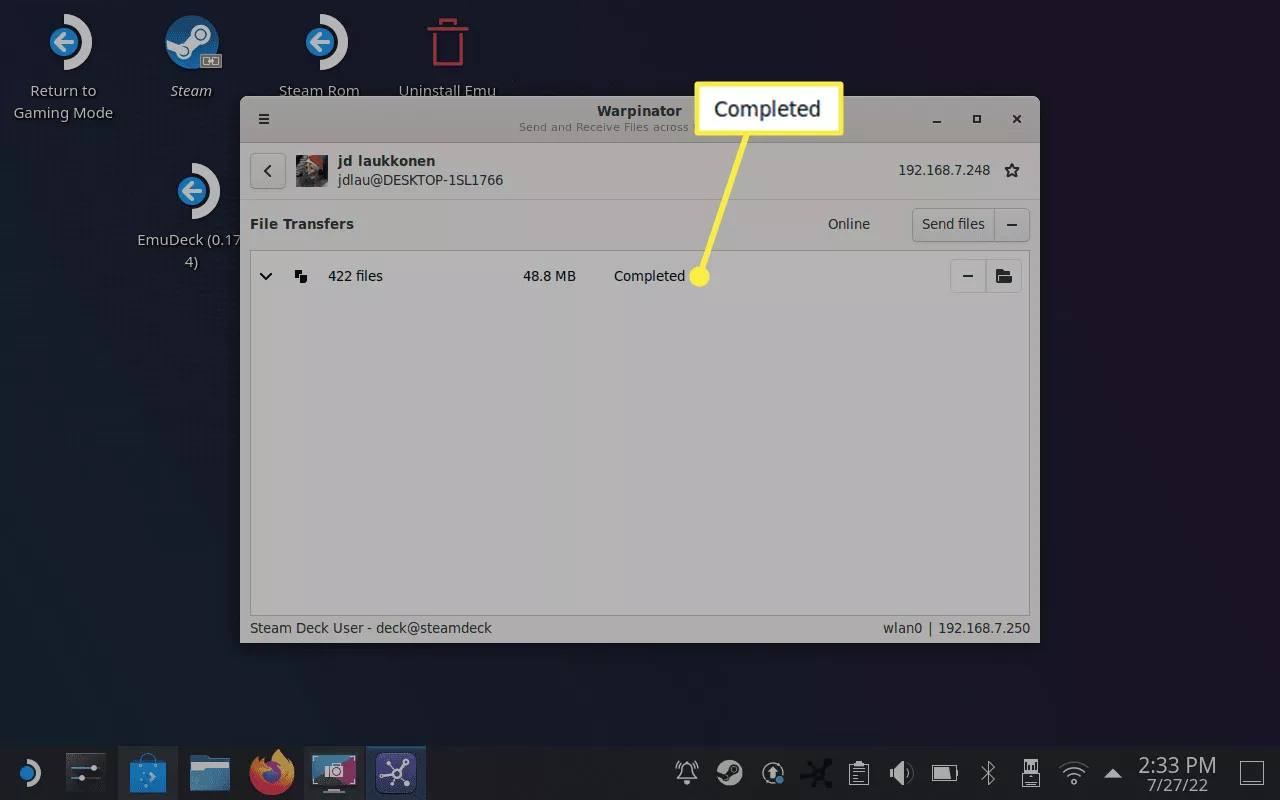
When you see Completed, the files are now on your Steam Deck.

Tap Send files in Warpinator to reverse this process and move files from your Steam Deck to your PC.
Can You Transfer Between Steam Deck and PC with SD Cards?
You can transfer files between a Steam Deck and PC with an SD card or USB flash drive, but there are some limitations. If you’re currently using a micro SD card to expand the storage of your Steam Deck, you can’t use that card to transfer files. In order to use an SD card as storage for your Steam games, your Steam Deck formats the card in a format that your PC can’t use. That means you need a separate SD card or a USB stick if you want to transfer files through this method.
To transfer files between a Steam Deck and a PC card using this method, first format your SD card or USB card using the exFAT file system. This is a file system that both Windows and Linux can read and write to, so you'll be able to transfer files both ways. You can then put files on the SD card or USB stick from your PC, move the SD card or USB card to your Steam Deck, and transfer the files.
Your Steam Deck needs to be in Desktop Mode to transfer files via micro SD or USB stick. Make sure to remove the card when you’re done. If you leave an SD card in your Steam Deck when you switch back to Gaming Mode, it will want to format the card.
Can You Transfer Between Steam Deck and PC With a Network Drive?
If you have a network attached storage (NAS) device, you can access it from your Steam Deck in desktop mode. That means you can copy files to the network drive from your PC and then access them from your Steam Deck. The way this works is you need to enter desktop mode on your Steam Deck, open the Dolphin file explorer, select Network, and then select your network drive.
If you have Samba shares set up on your PC, you can access them using this same method. Open the Dolphin file explorer, and you’ll find the Samba shares in Network > Shared Folders (SMB).
Why Connect a Steam Deck to a PC?
The primary reason to connect your Steam Deck to a PC is to transfer files. You can transfer media files, including photos and movies, and then access them through the desktop mode. You can also transfer game mods and other things that you can’t get through Steam.
You can also connect your Steam Deck to your PC through Steam if they’re both on the same network and your PC is running Steam. This doesn’t allow you to transfer files, but it does allow you to stream games to your Steam Deck that are installed on your PC. If you have a powerful gaming PC, and a fast home network, this allows you to play games without installing them on your Steam Deck. This is also the easiest way to play modded games on a Steam Deck, as you can just mod the game on your PC and then stream it.
To stream a game from your PC to your Steam Deck, open the game from your library on the Steam Deck, tap the down arrow next to the install button, and select your PC from the list. The install button will change to a stream button, which you can tap to start playing.
How to Connect Steam Deck to a TV
FAQ
-
Can I connect a keyboard to my Steam Deck?
Yes. You can plug a USB keyboard directly into the Steam Deck USB-C port, or you can connect a wireless keyboard via Bluetooth.
-
How do I connect my Steam Deck to my TV or monitor?
You need an HDMI to USB-C adaptor. Plug an HDMI cable into your TV or monitor, plug the adaptor into the USB-C port on your Steam Deck, then attach the HDMI cable to the HDMI end of the adaptor.
-
How do I connect Airpods to my Steam Deck?
To put your Airpods in pairing mode, place your AirPods in their case, open the lid, and tap the button on the case until the status light starts blinking. Then, go to Steam > Settings > Bluetooth and choose them in the list of available devices.